Getting paid should be the easy part of running a photography business. But for most photographers, invoicing is an awkward mix of spreadsheets, Venmo requests, and hoping clients remember to pay. Some send invoices through PayPal. Some type up a PDF every time. Some just text their Venmo handle and hope for the best.
None of that is professional, and none of it gives you a clear picture of how your business is actually doing financially. This guide walks you through creating branded invoices in fstop, sending them to clients, and tracking every payment in one place.
1 Create a New Invoice
Go to the Finances page and click New Invoice. Select the client this invoice is for, and fstop pulls in their details automatically.
Now add your line items. Each line item has:
- Description — what you are charging for ("Wedding Photography - 8 hours", "Engagement Session", "Retainer/Deposit")
- Quantity — how many units
- Rate — the price per unit
Fstop calculates the line item totals and invoice total automatically. You can add as many line items as you need — most photographers use two or three: a deposit line, a remaining balance line, and sometimes a travel fee or album add-on.
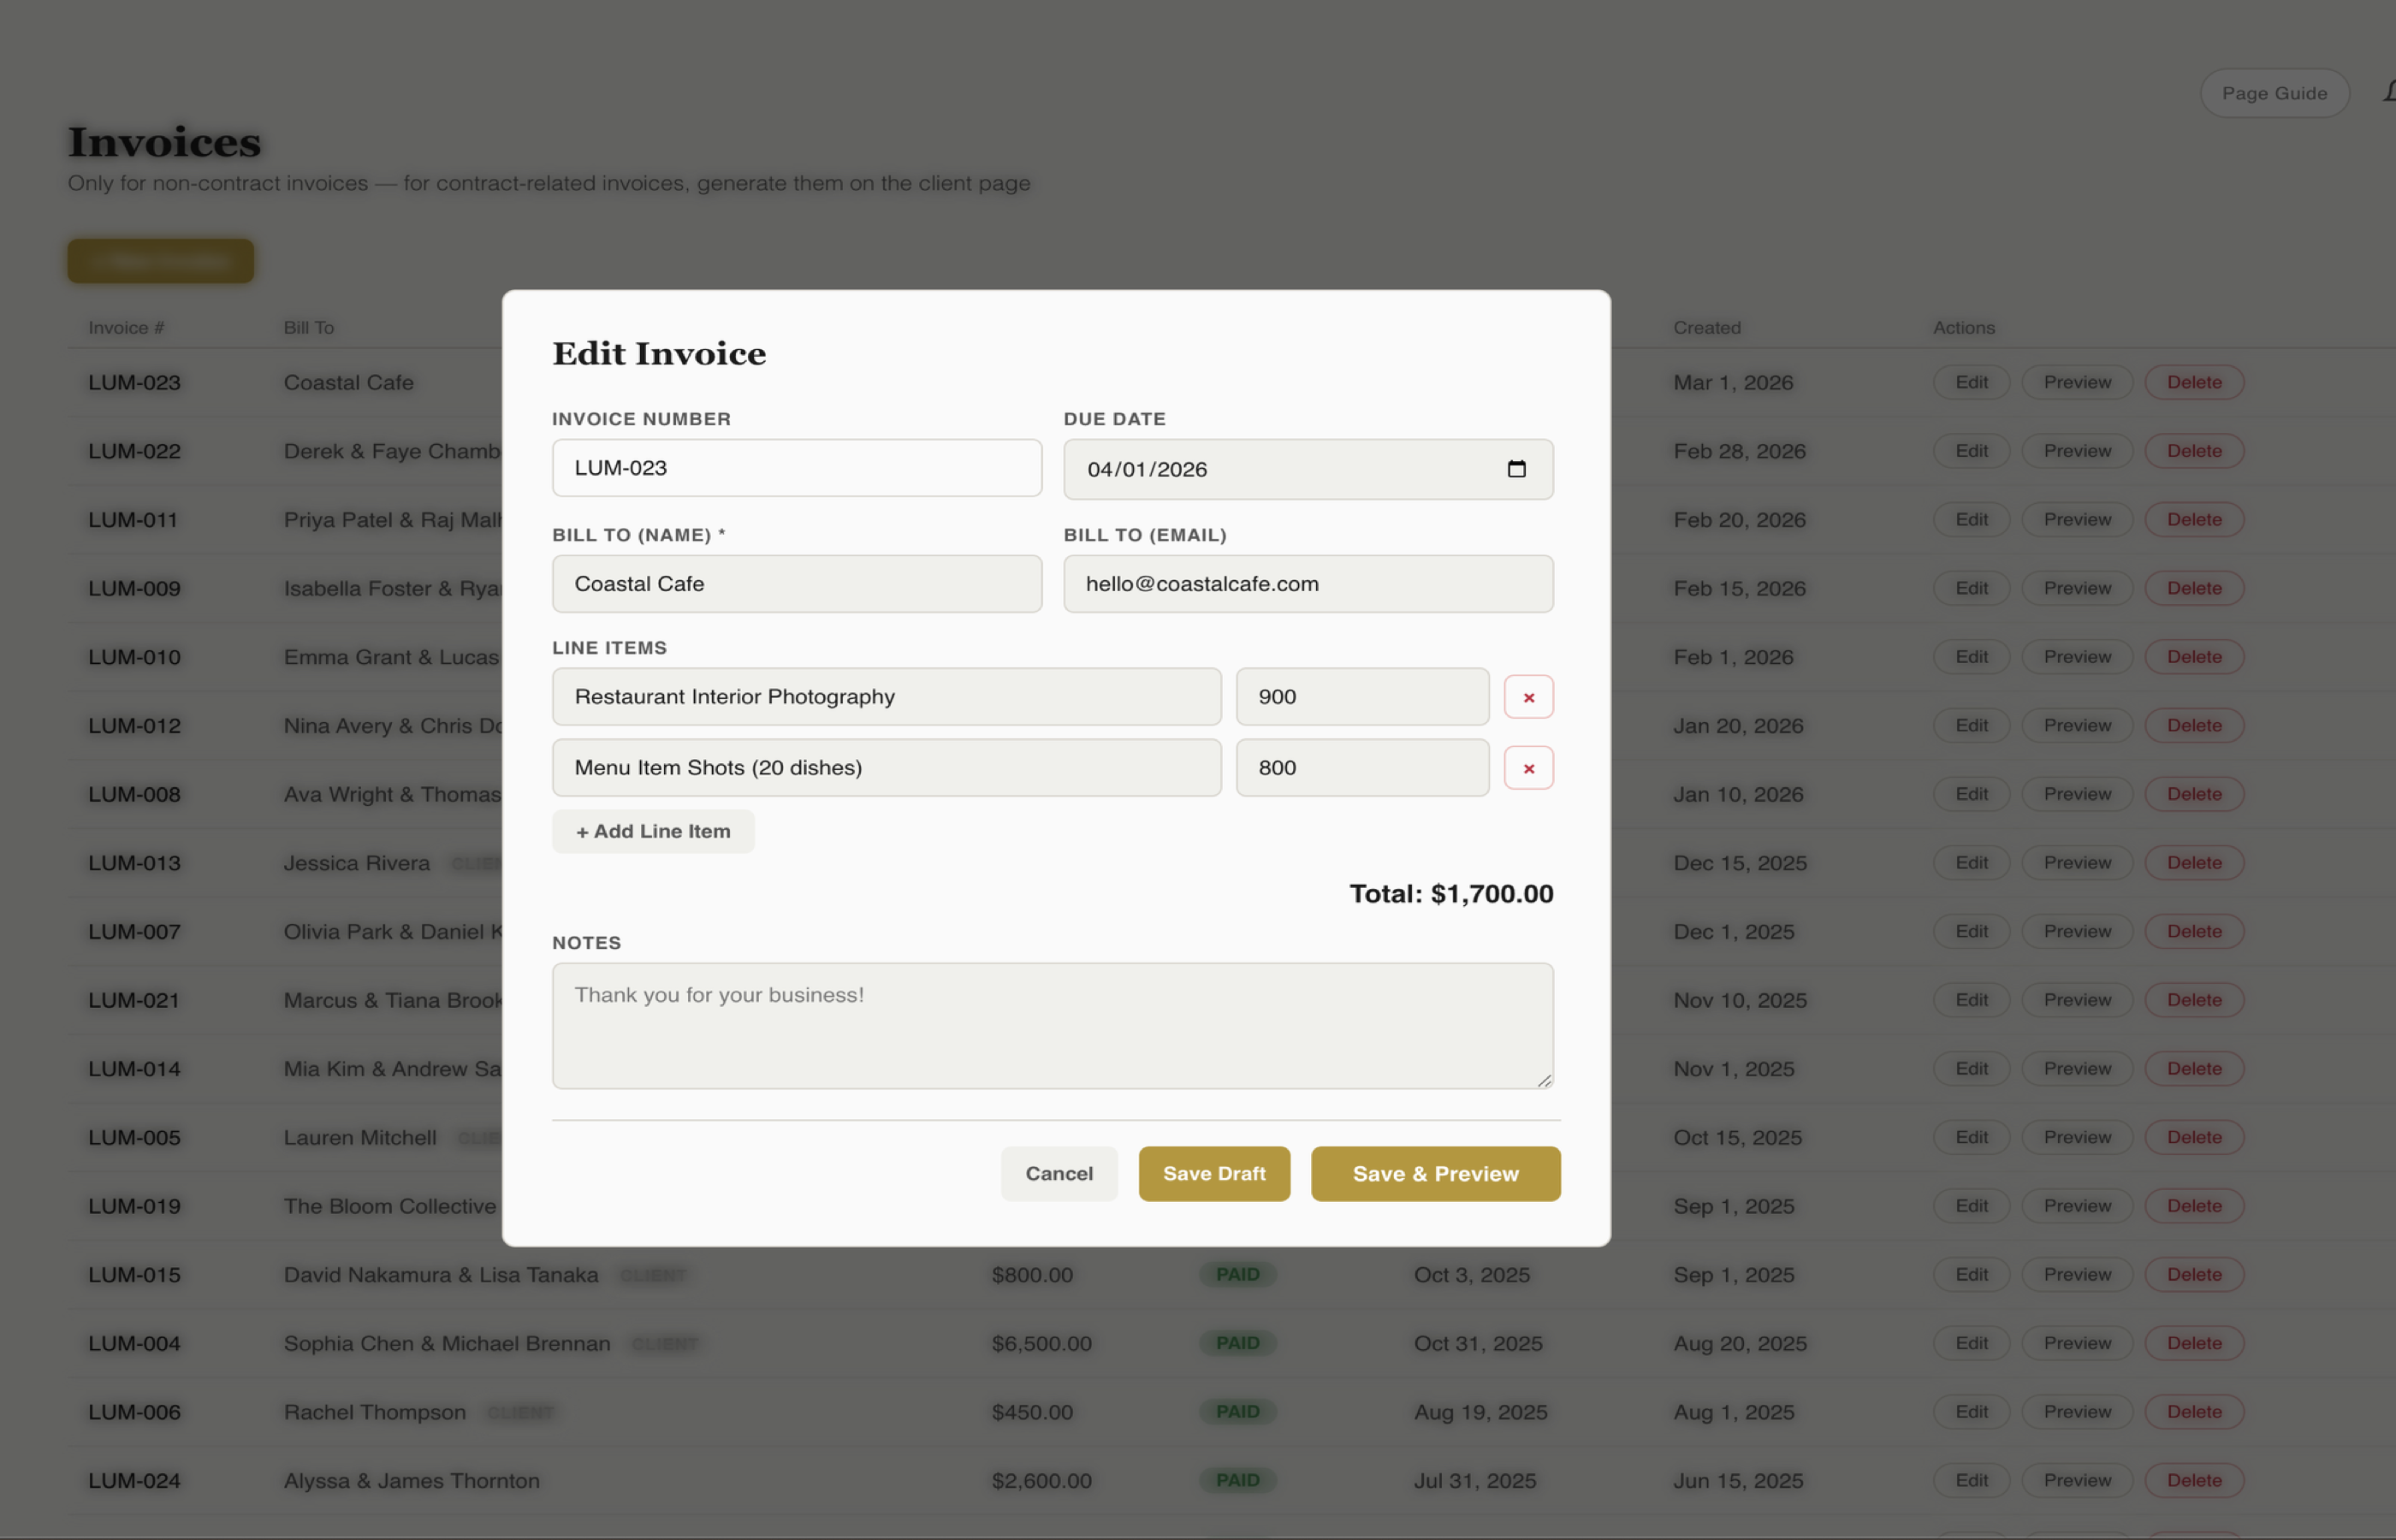
The invoice editor with line items, automatic totals, and your branding applied.
You can also add:
- Payment terms — due on receipt, net 15, net 30, or a custom due date
- Notes — any additional context ("50% deposit due to reserve date, remaining balance due 2 weeks before event")
- Invoice number — auto-generated, but you can customize it if you have your own numbering system
Tip: For wedding photographers, a common setup is two invoices per client: a deposit invoice sent right after booking (typically 25-50% of the total), and a final balance invoice sent 2-4 weeks before the wedding date. Creating both upfront takes two minutes and means you never forget to collect the balance.
2 Preview Your Invoice
Click Preview to see your invoice exactly as the client will receive it. The preview shows your logo, brand colors, line items, totals, payment terms, and any notes you added.
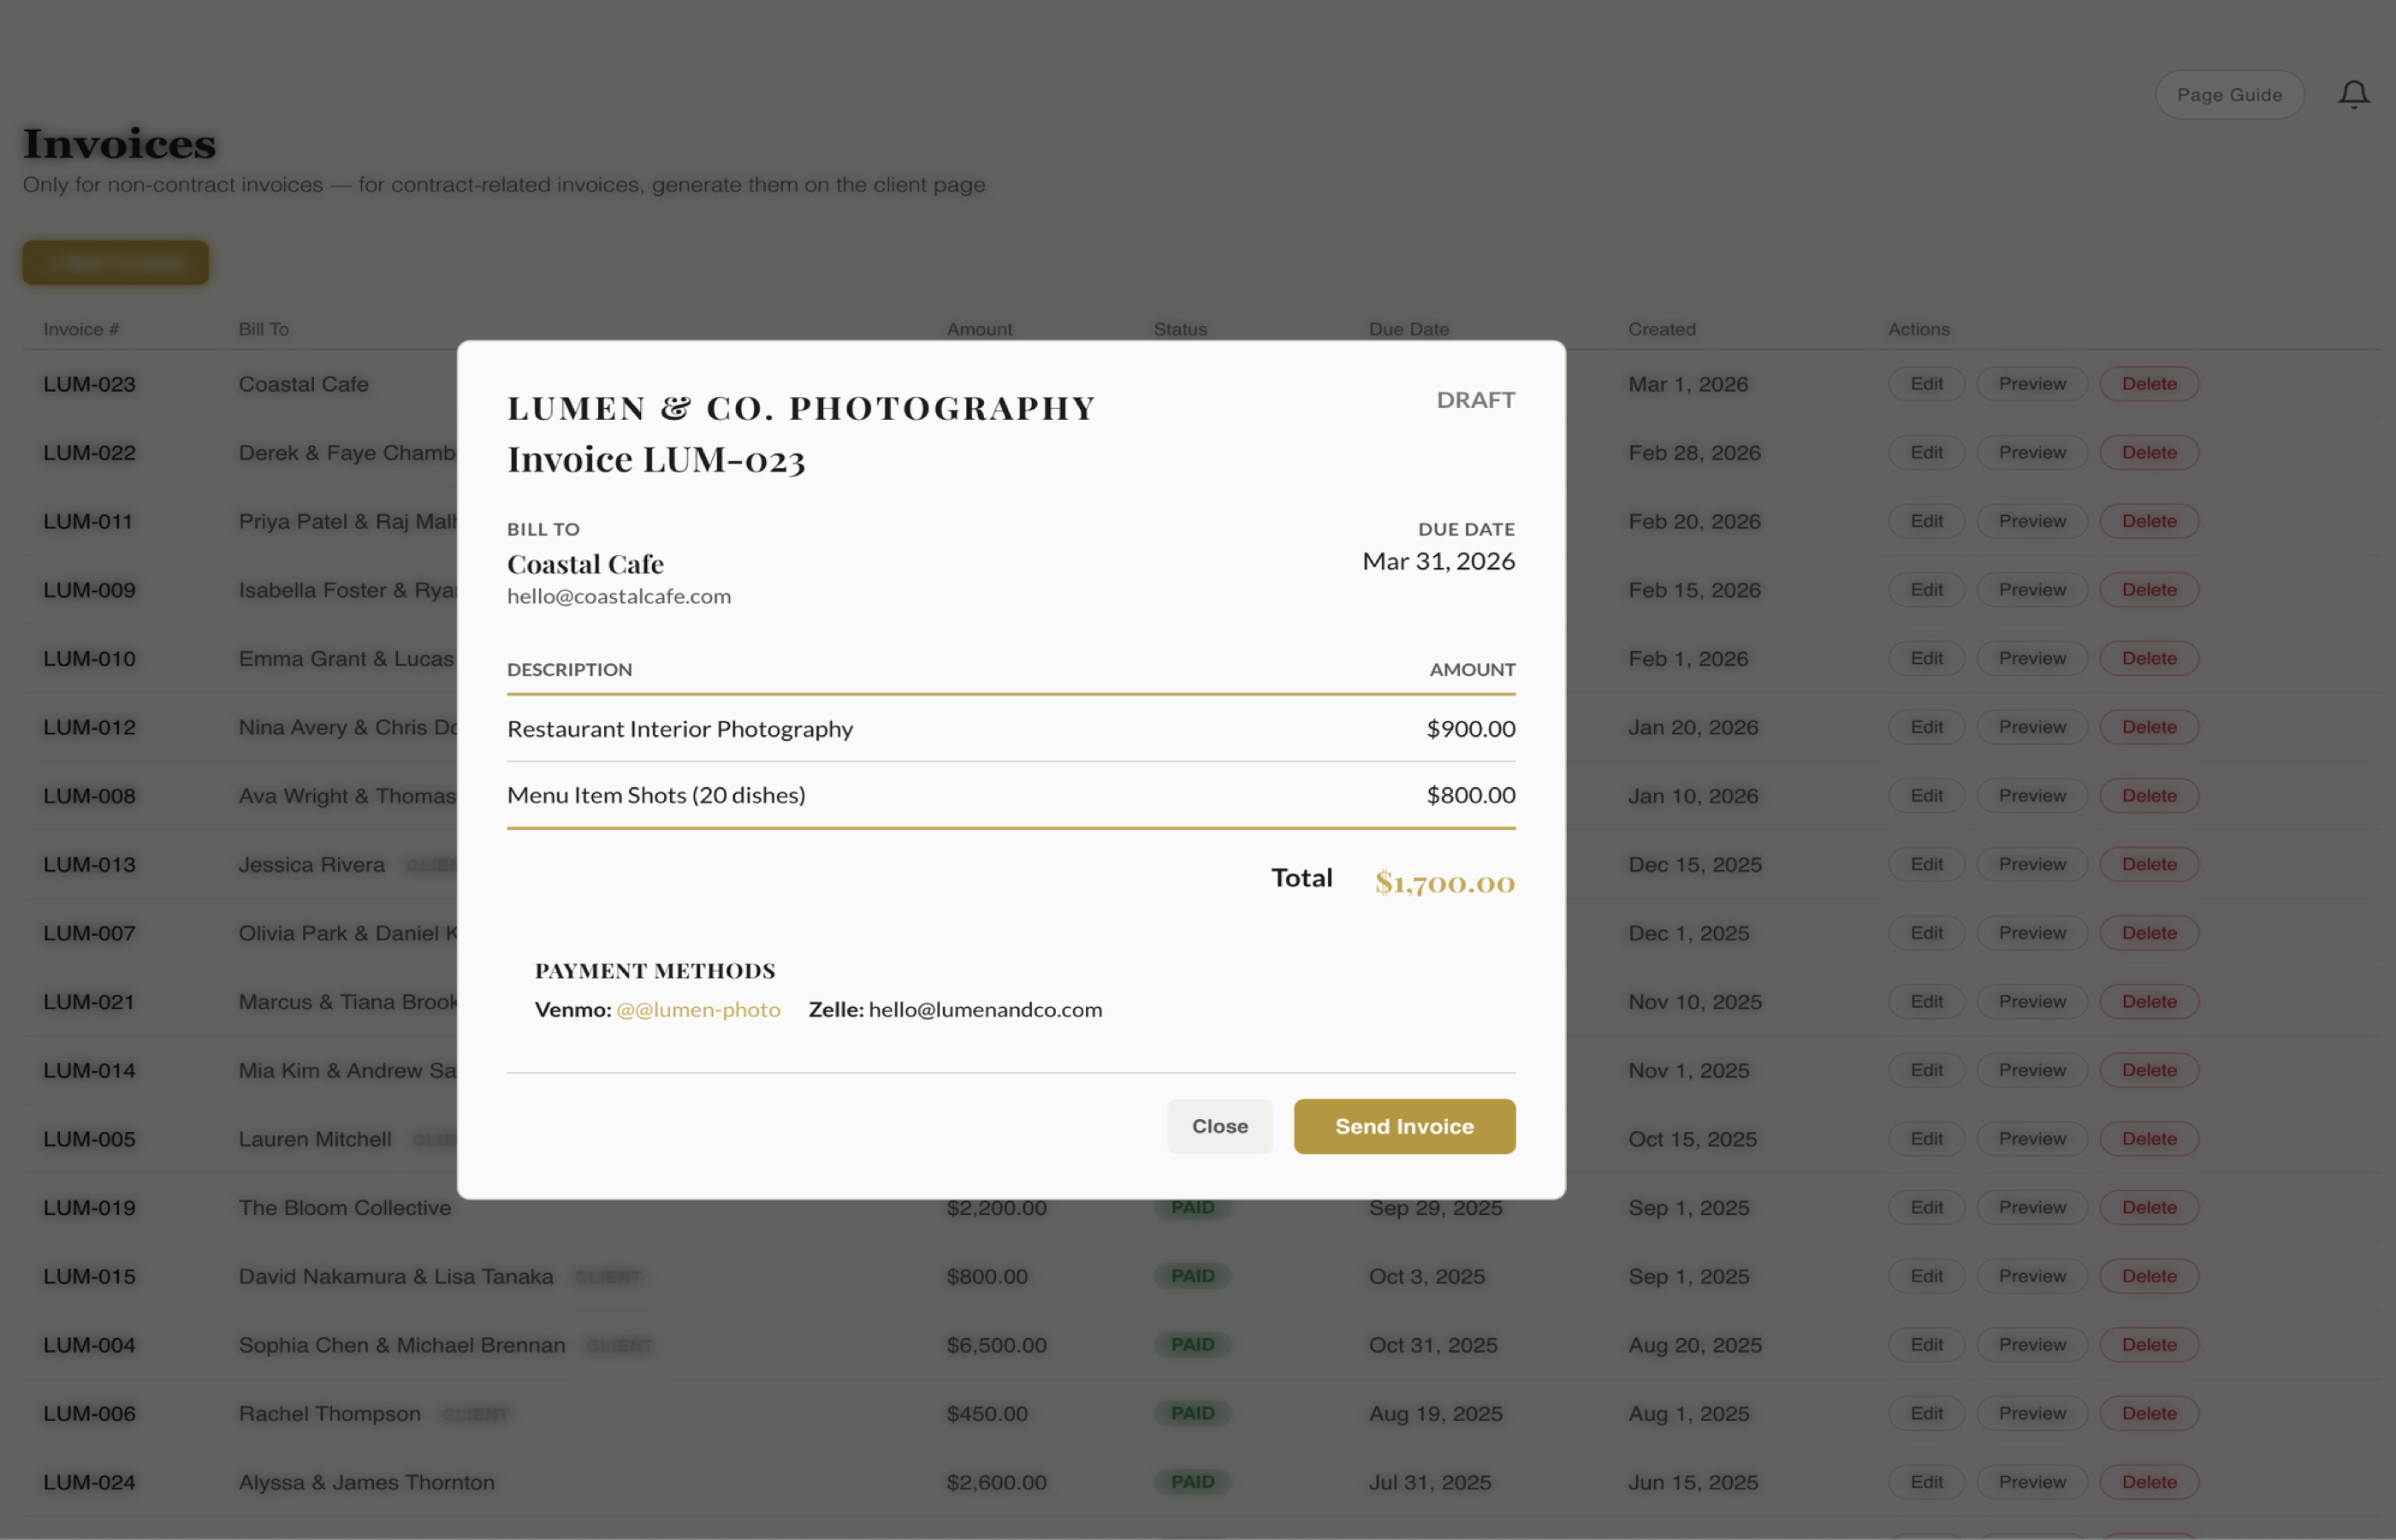
The preview shows exactly what your client will see — your branding, line items, and totals.
Check that the line items are correct, the total adds up, and the payment terms are what you want. This is also a good time to make sure your branding looks right. If you have not set up your branding kit yet, your invoices will use the default styling, which still looks clean but will not carry your logo and colors.
3 Send the Invoice
When the preview looks good, click Send. Your client receives a branded email from your connected Gmail with a link to view the full invoice. They can review the details and see exactly what they owe.
The client experience is clean and professional:
- They get an email that looks like it came from you, not from a random software company
- They click through to a branded invoice page
- They see the line items, total, and payment terms
- Everything is mobile-friendly — clients can view and act on invoices from their phone
Timing matters: Send the deposit invoice immediately after the client agrees to book. The longer you wait, the more likely they are to second-guess or get distracted. If you have already sent a contract, follow up with the deposit invoice the same day.
4 Track Payments
Once invoices are out, the Finances page becomes your financial dashboard. Every invoice you have ever sent is listed here, and you can filter by status:
- Paid — the client has paid in full
- Pending — sent but not yet paid
- Overdue — past the due date and still unpaid
- Draft — created but not yet sent
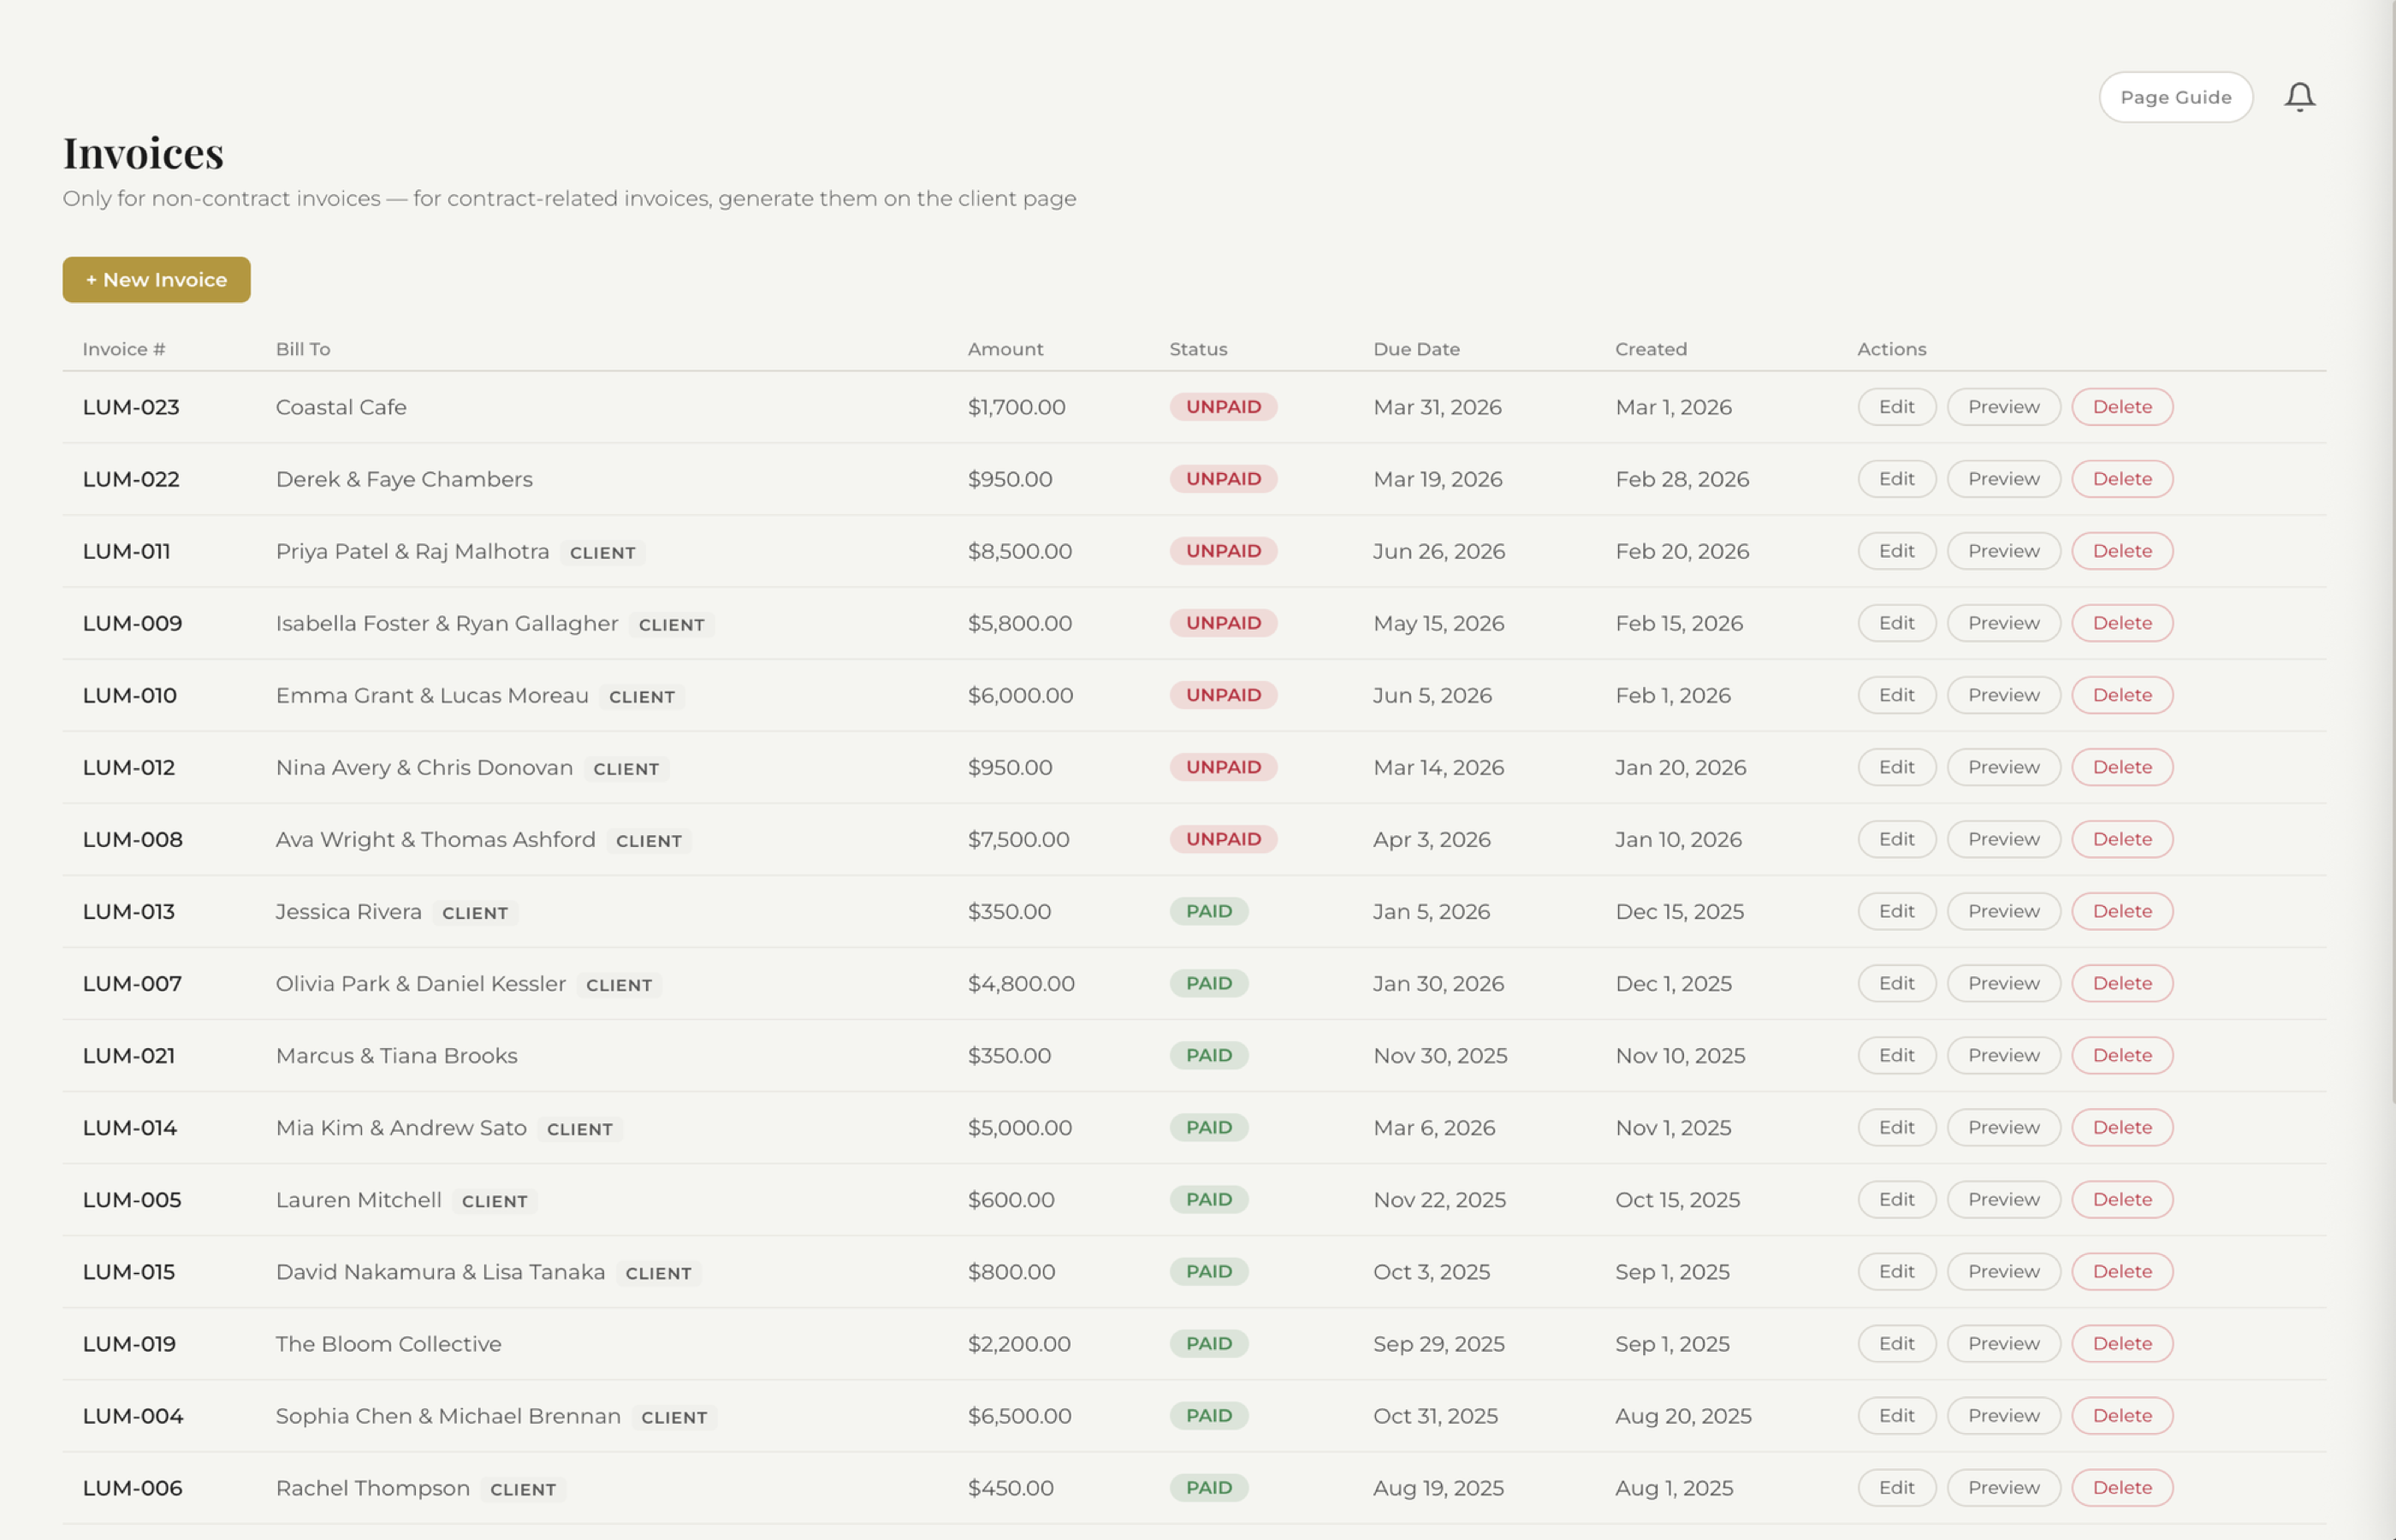
All your invoices in one view. Filter by status to spot outstanding payments instantly.
No more opening a spreadsheet to figure out who has paid and who has not. One glance tells you exactly where your money stands.
5 View Per-Client Payment History
Open any client's record and you will see their complete financial history: every invoice sent, every payment received, deposits collected, and outstanding balances.

Per-client payment history shows every invoice and payment in one place.
This is especially useful when a client asks "how much do I still owe?" or when you need to check whether a deposit came through before confirming a date. No digging through email, no checking your bank app — it is all right there in the client record.
Invoice Best Practices for Photographers
A few things that make a real difference in getting paid on time:
- Send invoices immediately. Do not wait days after a booking to send the deposit invoice. The client is most motivated right after they say yes.
- Be specific with line items. "Wedding photography" is vague. "Wedding Photography - 8 hours coverage, 400+ edited images, online gallery" tells the client exactly what they are paying for and reduces questions later.
- Set clear due dates. "Due on receipt" or a specific date works better than "whenever you can." Clarity prevents awkward follow-ups.
- Use two invoices for big bookings. A deposit invoice to secure the date and a final balance invoice due before the event. This protects you financially and gives the client a clear payment schedule.
- Keep it branded. An invoice with your logo, colors, and professional formatting reinforces that you are running a real business. It also makes clients take the payment more seriously.
Start Getting Paid Faster
Create branded invoices, track payments, and see your revenue at a glance. All included in every plan.
Start Your Trial